Showing posts with label Paula. Show all posts

Wednesday, 21 September 2011

Something sweet ♥

Hello Maria here with a card from Paula 
Paula has little break from blogging for personal reasons but she asked me to post this card for you .

 Paula has used one of the new images Travel Lite
Isn't she pretty!!
Paula uses Promarkers for coloring but she will post more detail on her card in her blog 
as soon as she has the opportunity.

Be back tomorrow for my Sugar Bowl card :) 

Wednesday, 7 September 2011

Here for you...

Good Evening Sassy fans, I hope you are all well?
How excited are you about the next release and blog hop??? 
Take it from me... the new stamps are AMAZING!! 
not long to wait now till you get your first peeks....

Today I'd like to share a card I've made using Luv a Latte   I think she's definitely 'up there' in my top 3 Sassy's ... She's so fun to colour!


I've coloured her with promarkers and pencils...
The papers are a mix of different MME and Prima
The little tabs at the bottom are just punched circles cut in half... I stamped a teeny heart on each of them for a bit of interest.
The little swirls of steam coming from her 'cuppa' is from a small mug of hot chocolate stamp I had in my stash, I just inked the bits I wanted.... 
I did the same with the Sentiment stamp, which is actually a postage stamp design, I just inked the wording....
I added a few flowers and a couple of ribbon tabs... and did a bit of doodling to finish...

and thats it really...

Thanks for stopping by today!
Paula
xxx

Wednesday, 31 August 2011

Happy Hugs...

Good Evening Sassy fans!!...
Paula here with your Wednesday evening Sassy fix...

Today I'm sharing a card I made with the oh so cute 'My Friend Kitty'

You can grab her HERE at funky kits 

I just love the expression on her face!! you can just tell EVERYTHING makes her happy!
I've coloured her with Promarkers and pencils...
The papers are a mix of different MME and kraft


I added a rolled Kraft flower at the bottom with a button centre
The die cut letters are from a crate paper kit... 
The clouds are hand doodled and cut
and the ric rac and heart buttons are from my stash...

Happy hugs all!!
Thanks for stopping by...
Paula xxx

Wednesday, 24 August 2011

Boy oh Boy...

Good evening Sassy Sisters! 
(I like that, do you think it will catch on?)
Today I thought we'd have something different, and go all manly...
well....sort of... ;)

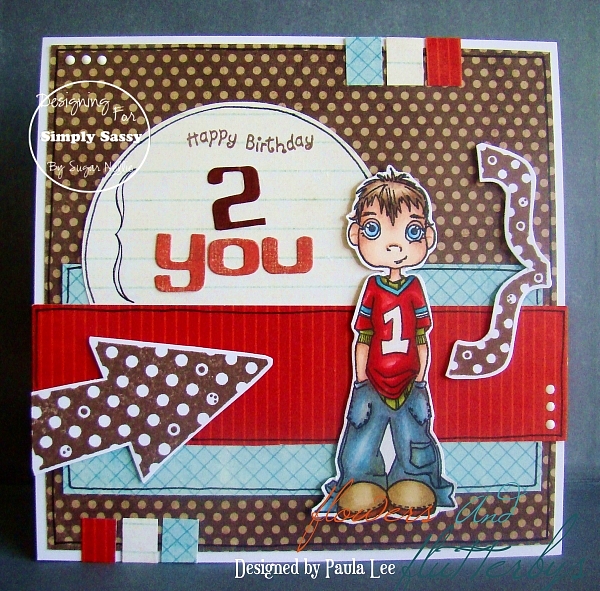
 I've used No 1 fan
just look at his cheeky little face!! I LOVE him!!

Did you know he can come and live with you for just £4.29!!! 
then you can pinch his little cheeks as much as you like!!
And all your Sassy girls will adore him ;)

I do love making cards for boys and men, and lets face
it, we all HAVE to do them from time to time...
Sometimes its tricky when you can't use your ribbons and flowers... but I find you can embellish just enough with cool alphabet stickers and funky accessory stamps.... there are LOADS out there...
even just adding the tabs of scrap paper at the top and bottom made a huge difference in pulling the card together...

Sorry I'm rambling...
You can find more information about this card over on my blog

Before I go, there was a question from Ali on my cloud tutorial about whether or not to 'seal' the chalking to prevent smudges...

I actually don't, I haven't had any smudging problems, but there's no reason you can't, if you think the card might be excessively handled.
There are spray fixatives out there (I'm not sure I'm allowed to say the brands)
most art stores will sell them, they will also work for pencils, charcoal and pastels.
(and they also help prevent fading, which might be another advantage)

hope that helps!!

Thanks for stopping by today!
Paula
xxxxx

Thursday, 18 August 2011

Simple Chalked Cloud Tutorial

Good Morning!
Paula here with my second Sassy post!!
 Before I start I'd like to say a HUGE thank you for all the lovely comments that were left on my first post... its so lovely to get feedback!

I decided I'd share a little tutorial on how I create chalked clouds...
Now I know there are better ones out there, BUT this is so easy !!
(Even my husband followed it, just from the pictures!)

Firstly, I punch 2 different sized flowers from scrap card... 
(really, you can use any flower punch, as long as the petals are rounded, or even a scalloped edge nestie could do the trick) these are 1" and 2" 6 petal flowers


 Next , I cut each flower in half... 


this step is a little tricky to see in the photo, but basically, I assemble all the cut pieces so that the 'petal' edge resembles a cloud shape that I'm happy with ...
(secure with tape)


Take whatever shape you want to use as your chalked background...
Starting at the bottom right, hold the template securely at whatever angle you like, and chalk in circular motions across the top edge.
(excuse my not showing you the chalking bit... I do this bit with my finger *blush* and I'm sure that's not going to look pretty!)


Remove the template, and reposition at the bottom left, and chalk again! not the full length this time, stop when you touch the chalk line from the first bit...


Then position the template in the middle above the two sides you've just chalked..
make sure the existing chalk lines are visible... so that you chalk up to them, and not above them.


repeat the steps until you reach the top (right, left then middle)
And thats it!!


at this point I draw around the edge with a fineliner, but thats optional ;)

Tips!
Keep the template... then you don't need to make another!
blow away excess chalk after each section, otherwise it smudges!

Well, that was my first ever tutorial, I hope it was okay?

I used this chalked panel on my Spotlight card from Tuesday (this post HERE)

But I've used the same method for todays card... just the shape is different...


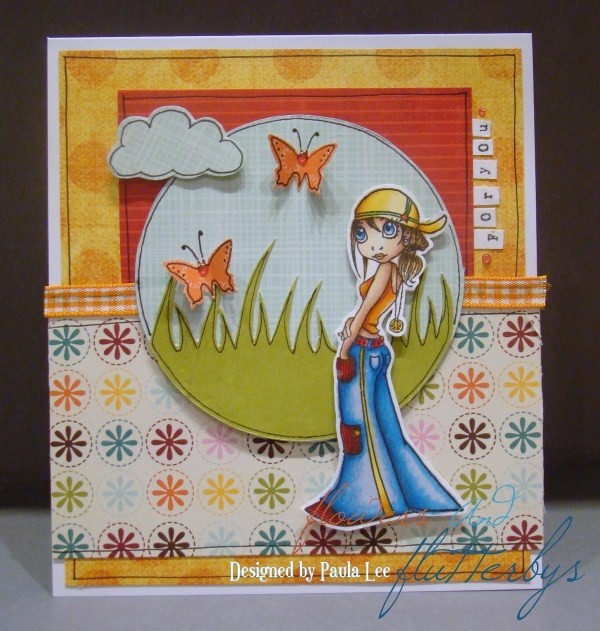
I've used Hippie Chick, and you can grab her HERE at funky kits...
(more info on the card at my blog)

And this card is completely unrelated to the tutorial, but I wanted to show it anyway because I followed the FAB sketch over at the Sugar Bowl  
This is Skater Girl.... GRAB her HERE...

Thanks for visiting us today!
Paula x

Tuesday, 16 August 2011

Tuesday Spotlight

This Tuesday your getting to know 
our new Guest designer a little better
Look at this gorgeous card she made for the spotlight..
Here she have used Butterfly Girl  
(and there is a rumor that there will be a tutorial connected to this card later this week so watch out!!)

*Start by telling us a little about you:
Hi, I’m Paula.

I’m 33 years old, and I live in Derbyshire UK, with my very understanding, but slightly bewildered Hubby (he just doesn’t get the excitement of papers, stamps and colouring! I swear he thinks there’s something wrong with me!) I have a 12 year old Son, who never fails to make me laugh!

*When did you start card making and what made you start?
I’ve been card making for about 4 ½ years now, and still loving every minute! I started when I visited my Sister in Law, shortly after she’d been to a card making workshop..she showed me a couple of the cards she’d made... I knew instantly I’d LOVE it! Even though back then it was all peel offs and decoupage.


*What is your preferred coloring medium?
I have to say Promarkers at the moment, as that’s really all I have! I do occasionally add some extra shading with some bog standard pencils...


*What is your fav Simply Sassy stamp?
Ooooh... you can’t ask me that!! Okay, my absolute favourite to colour has got to be Hippie chick BUT... Amelia appeals to the dreamer in me, and I think she’s such an original stamp!!


*How did you notice the Simply Sassy stamps the first time?
I first saw them on the lovely Maria’s blog actually!! And to be completely honest... at first I wasn’t sure if I liked them... I actually only bought my first one a couple of months ago... now I’m obsessed!!!


*What is your favourite style (card making)?
To look at... vintage, shabby, arty... I am so in awe of people who can create this style... I’ve tried, and I can’t pull it off! To make... I don’t think I have a style, my style is ‘choose some nice bits and pieces, and see what happens’... is that a style?


*And what would you love to see more of at the Simply Sassy blog?
Honestly, I know its a cop out, and EVERYONE says the same, but I really do think its perfect the way it is!

Take a look at all the pretty Sassy cards I found in Paula's blog..
Using Little Light of mine 

And this one using Vintage Boutique  That I just got in my mail box 
and obviously you see it's gorgeous but I swear it's prettier in real life♥


Thank you Paula for sharing and we're really happy to have you on our team!!
Pop over to Paula's blog and see  more gorgeous Sassy cards♥

Hugs Maria

Wednesday, 10 August 2011

Just a little note...

Good evening Sassy fans! thanks for stopping by... 
Paula here... with my VERY FIRST GDT creation for Simply Sassy! 
I'm SO EXCITED to be here, a little nervous though, so please go easy on me! ;)

Today I'd like to share a card I've made with one of the newest releases... 
You can grab her HERE at Funky Kits 
If you scroll down you can see another card made with her from the talented Autumn... 
(You can't get too much of a good thing, right?)


I first created a little 'hill' for her to sit on, by attaching a little bit of spotty paper to a background of Kraft card.
Then stamped the image directly onto this. I stamped a second image onto white cardstock and coloured her with Promarkers, cut her out, and attached her over the original image... 
(by doing this I didn't have to cut out any fiddly bits, like certain sections of her hair, 
and the headphone cables)

I doodled some flower stems on the 'hill' and added some little paper flowers, and gave her a little bow for her hair, which I made using a tiny scrap of fabric, and a tiny heart button.


The papers are a bit of a mix... the musical note paper is Echo Park -Victoria Gardens
The pink flower paper is MME
Houndstooth paper from Pink Paisley
And I'm not sure of the others, they were from my scrap drawer.
Main background is Kraft.

I doodled the 'note' on pink gingham paper, and hand cut.
The sentiment stamp is from ladybug and friends

To finish, I've added a few drops of ranger enamel accents in black and white, and doodled around the edges with a black fineliner.

Well, that's my first post out of the way... phew!!
I hope I didn't add too much information?
I tend to get a bit carried away!

Paula 
xxxx