Morning Sassy Fans,
Wow do I have a sweet treat for you today, and the best of it is it's calorie freeeeeeeeee! Whilst attending the craft show at Alexandra Palace recently with my sister and niece we saw one of these cupcakes and my sister said, you could make one of these. Enough said, so for my tutorial today I thought I'd show you, and I might add this is the first time I have made one, lol, how to make the cupcake and what better image to add to the box than the Witch's Cauldron, available
HERE, as she is making a special calorie free cupcake brew, lol. We all need one of these.
Well, it's a long post so grab a cofee and off we go............ You will need some strong card, I used the back of a cereal box, normal cardstock, papers, glue, a polystyrene ball, and whatever you want to use to decorate it, ribbon, flowers, stickles, glamour dust, perfect pearls, and accetate if you want to make the box. It's really up to you.
This is what we are going to make:-
This is what you will need:-
Strong cardstock for your base (I used a cereal box)
Paper for the cupcake case, 2 x 12" strips
Ribbon x two colours x 1 metre each or thereabouts
I polystyrene ball
Glue
Elastic Band
Scissors
Accetate x 4 pieces 12.5 x
Cardstock and Punchfor the box
Decoration: flowers, perfect pearls, ribbon, lace, whatever you fancy
Your choice of image, mine is Witches Cauldron by Simply Sassy available
HERE
First cut a 6 inch circle out of your strong cardstock (this is my cereal box). Mark out a 2 inch circle in the middle and then mark out 16 even wedges.
Cut each wedge up to the outside of the 2 inch circle.
Place the ball inside the cupcake. Put an elastic band around it and glue the flaps. I used a hot glue gun but any glue will suffice, you'll just have to be patient and let it dry.
This is how it should look. Then glue your ball into the bottom of the cup.
If you are using 12 x 12 paper, cut two two inch strips. I used digital paper printed 6 x 6, so I cut 4. Then glue all the ends to together and make a circle.
It should look like this.
Cup around your cupcake base and glue at the top and at the bottom.
Cut out a circle big enough to cover the bottom and stick down. I traced around my glue bottle.
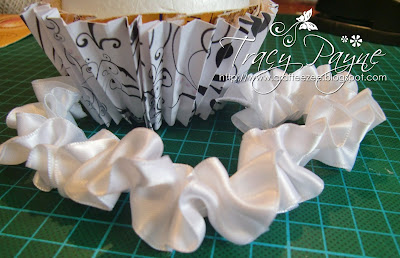
Now onto the decoration. You can ruffle your ribbon two ways. Loosen the threads at the bottom and pick out a couple of threads from the middle section and pull.
Secondly, do a running stitch down the middle of the ribbon and when you get to the end pull the thread and ruffle the ribbon and secure.
This is your icing. Now time to decorate.
A layer of lace and then white icing.
I airbrushed a few flowers to make them black.
Another layer of black icing.
I then added some liquid pearls, glamour dust and for the black cherry, I rolled up some airdray clay, painted it white with some acrylic paint and then airbrushed it black and add some more glamour dust as all cupcakes need a sprinkling of sparkly stuff don't they.
If you want to make a box, then read on.
You need to cut two squares of 7 x 7 cardstock and score 1 inch each side. Then cut out the triangles marked with the dashes.
Glue the edges to the inside of the box.
Once you have two completed. You will need 4 sheets of accetate, 12.5 cm by 15.5cm
I cut 4 x 1.75 inch strips of cardstock and and punched both sides. You will need a total of 4 x 15.5" in length pieces. I then scored them down the middle.
Glue the accetate pieces to the punched edges as shown below.
Then place inside the cardstock base and glue all the way round.
Pop the lid on and decorate as required. Note I didn't glue the lid down so that you can take the cupcake out and whilst it lives inside the box it remains dust free.
And it wouln't be complete without your image. Here is the Simply Sassy Witches Cauldron. Hasn't she done well brewing up her snazzy black and white cupcake.
Here's a picture of the lid.
Hope you've enjoyed the tutorial.


